Ever try on pieces you love and still feel something’s “off”? It’s rarely about the size on the tag or the trend of the moment. The real difference comes from balance—how lengths, necklines, and fabrics work with your proportions. When those elements line up with your natural shape, outfits sit better, feel more comfortable, and look polished with less effort.
This guide offers a simple, body-positive way to get there. You’ll learn quick at-home measurements to understand your shape, the rule of thirds for easy proportion wins, and how to choose necklines, sleeve lengths, hemlines, and fits that flatter. We’ll also cover fabric and structure (think breathable knits with stretch versus crisp tailoring), plus color and vertical details that subtly elongate. Expect clear examples, not rigid rules.
Here’s what you’ll find: a step-by-step shape ID, specific tips for rectangle, round (apple), pear (triangle), inverted triangle, and hourglass; smart choices for tops, tunics, and dresses; outfit formulas for work, casual, travel, and events; a try-on checklist and quick tailoring tweaks; and a mindset refresh so you can use these guidelines flexibly. We’ll reference versatile options like V, scoop, boat, Sabrina, and turtleneck styles in regular, relaxed, and loose fits to help you pick confidently. Ready? We’ll start with a few fast measurements.
Step 1. Identify your body shape with quick measurements
Grab a soft measuring tape and take four measurements over thin clothing: shoulders (around the broadest part), bust (fullest part), waist (the smallest point above your navel), and hips (around the fullest part of hips and seat). Keep the tape level and snug—not tight. Jot down your numbers; a calculator on your phone is perfect for the quick ratios below.
-
Hourglass:
Waist ÷ (Shoulders or Bust) ≤ 0.75ANDWaist ÷ Hips ≤ 0.75 -
Rectangle:
Waist ÷ (Shoulders or Bust) ≥ 0.75with shoulders and hips close in size -
Pear (Triangle):
Hips ÷ (Shoulders or Bust) ≥ 1.05 -
Inverted Triangle:
(Shoulders or Bust) ÷ Hips ≥ 1.05 -
Round (Apple): Waist is wider than both shoulders and hips (approx.
Waist ÷ (Shoulders or Bust) ≥ 1.05)
If your ratios straddle two categories, that’s normal—use the tips for both shapes. Your goal is a clearer starting point so you can choose necklines, lengths, and fits that create balance. With your shape in mind, let’s use proportion to make every outfit fall into place.
Step 2. Use proportion to your advantage with the rule of thirds
Proportion is the fastest path to looking polished. Instead of splitting your outfit in half, aim for thirds: think 1/3 top + 2/3 bottom or 2/3 top + 1/3 bottom. This “golden ratio” visually lengthens and slims, and it works on every body shape. You can create these breaks with rises, tucks, belts, jacket lengths, hemlines, and even shoe choices. Monochrome looks and vertical details also extend the line, while equal halves tend to stump your frame.
- Create 1/3 on top: High-rise bottoms + a tuck or cropped top landing near your natural waist.
- Create 2/3 on top: A longer tunic over slim pants, balanced with a refined shoe.
- Move the break up: Belt at the natural waist over dresses, tops, or cardigans.
- Layer with intent: Short jacket over a longer top over fitted bottoms = stacked thirds.
- Choose elongating details: Low-vamp shoes, vertical seams/stripes, and column color.
- Avoid the 1/2–1/2 trap: Mid-hip tops with mid-rise pants often cut you in half; adjust tuck, belt, or hemline to restore thirds.
Step 3. Choose necklines that flatter your frame (V, scoop, boat, Sabrina, turtleneck)
Necklines shape the way your upper body reads—where the eye lands, how long your neck looks, and whether shoulders feel broader or narrower. Pick them with the same intention you use for hemlines: to create vertical lines where you want elongation and gentle width where you want balance. Here’s how to dress for your body shape using five versatile necklines found in many polished tops, tunics, and dresses.
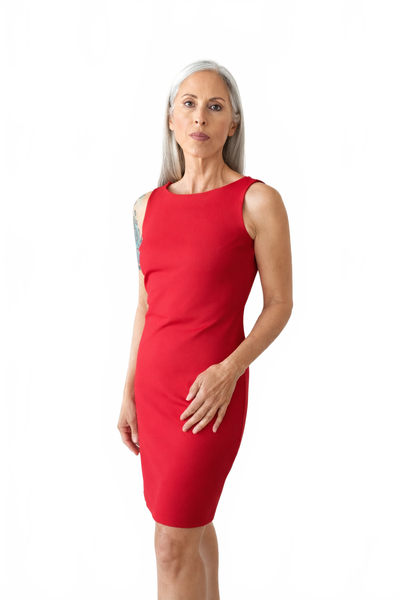
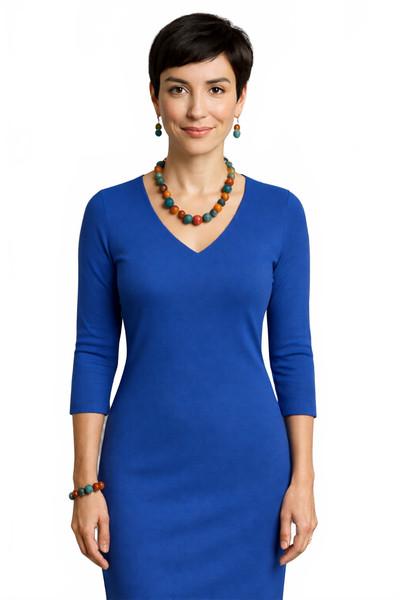
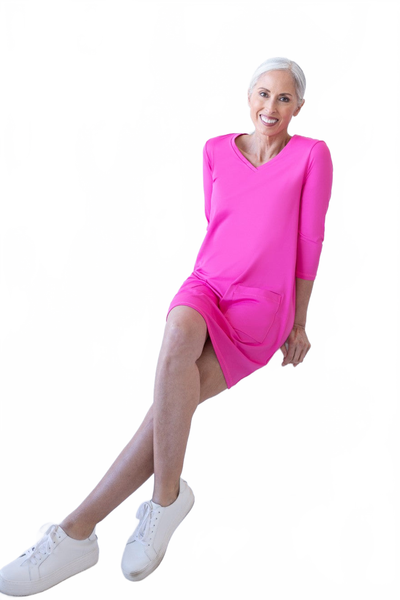
- V-neck: Elongates neck and torso, creates a vertical line. Great for round/apple shapes and fuller busts; also softens broad shoulders on inverted triangles.
- Scoop neck: Soft, open curve that adds light width to the chest. Lovely for rectangles and pears to add balance and draw the eye up.
- Boat neck: Broadens shoulders and highlights collarbones. Ideal for pears; less ideal for inverted triangles or very broad shoulders.
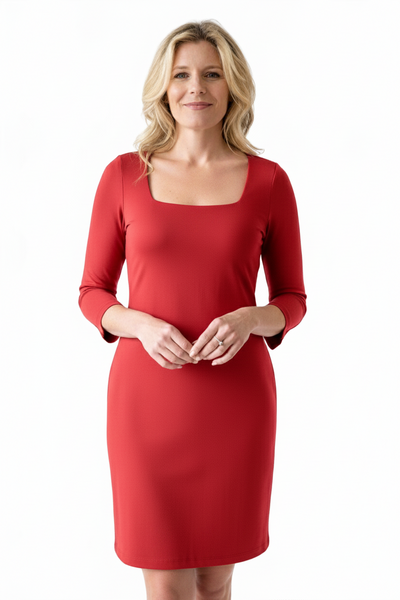
- Sabrina neck: Refined, slightly wide and straighter than a scoop. Polished on rectangles and hourglasses when you want openness without a deep plunge.
- Turtleneck: Adds visual volume up top and shortens the neck. Best in fine-gauge knits on rectangles and pears; on apples/hourglasses, layer under an open jacket or add a pendant to restore a vertical line.
Step 4. Pick sleeve lengths, top lengths, and hemlines that balance your silhouette
Where fabric stops changes how your shape reads. Use the rule of thirds to place breaks at visually slim points—waist, high-hip, knee, or ankle—and let sleeves and hems create vertical lines instead of cutting you at your widest areas. Small shifts in length can make the whole outfit feel taller, lighter, and more intentional.
-
Sleeve lengths:
- 3/4 sleeves: Showcase the wrist (a narrow point) and slim the arm—flattering on every shape.
- Cap/extended shoulders: Add width up top—great for pears; skip if you’re an inverted triangle or have broad shoulders.
- Dolman/kimono sleeves: Soften the shoulder line and minimize breadth—useful for inverted triangles and anyone who wants a gentler shoulder.
-
Top lengths:
-
Waist to high-hip: Works with high-rise bottoms to create
1/3 top + 2/3 bottom. -
Mid-thigh tunics: Create
2/3 on topwhen paired with slim, straight, or narrow-leg pants. - Test the breakpoint: If a hem lands at your widest spot, adjust by tucking, belting, or choosing an inch above/below.
-
Waist to high-hip: Works with high-rise bottoms to create
-
Dress and skirt hemlines:
- Above-knee to knee: Elongates legs—especially effective for round/apple figures and universally polished for work.
- A-line/fit-and-flare: Balance hips on pears; pencil and bias cuts define hourglass waists.
- Midis with movement: Slits, vertical seams, or column color prevent heaviness and keep the line long.
-
Pant hems:
- Full-length straight or wide: Skim the top of the foot to lengthen; straight legs are easy for round/apple shapes.
- Crops: Aim for the slimmest part of the ankle and add a low-vamp shoe to maintain vertical flow.
Step 5. Nail the fit: when to choose regular, relaxed, or loose fits (and when to tailor)
Fit is the fastest way to flatter your shape. Too tight compresses and rides up; too baggy hides your proportions and blurs the rule of thirds. Aim for fabrics with gentle stretch that skim rather than cling, and place your breakpoints (waist, hem, cuff) at slimmer areas. Many polished tops come in three useful fit profiles—use them intentionally, then fine‑tune with simple tweaks.
-
Regular fit: Shaped at the waist with room through the hips. Great everyday choice for rectangles and hourglasses to show definition, and for pears who want a clean skim over the lower half. Works beautifully with high-rise bottoms and a half-tuck to create
1/3 + 2/3. -
Relaxed fit: Fuller through waist and hips. Comfortable for round/apple shapes to ease the midsection and for inverted triangles who prefer less structure up top. Balance with slimmer pants or a straight leg, and place the “waist” with a front tuck or belt.
-
Loose fit: Easy through the body for a column effect. Best in fluid knits to avoid bulk. Pair with narrow or straight bottoms; add a belt when you want definition. Vertical seams, slits, and monochrome keep the line long.
-
When to tailor: Adjust hems to hit at the knee, ankle, or high-hip for clean thirds; add subtle waist shaping if a top or dress feels boxy; choose double‑front styles when you want a smoother, no‑show silhouette. If a piece pulls, pools, or rides up as you move, size for comfort first, then refine with tucks or minor alterations.
Step 6. Dress the rectangle shape: create a defined waist and soft curves
Rectangles wear the same size on top and bottom and have a straighter waist. Your goal: add shape by defining the waist and creating gentle volume where it flatters. Think strategic structure plus soft drape. Use the rule of thirds to place the “waist” higher, then build curves with fabric, seams, and smart layers.
- Cinch the middle: Belts, wrap tops/dresses, and belted jackets carve a waist instantly.
- Choose curve-makers: Peplum hems, ruching, and tie-fronts add dimension through the midsection.
- Necklines that soften: Scoop, V, and Sabrina open the chest and create feminine lines.
-
Proportion play: High- or mid-rise bottoms + a half-tuck = easy
1/3 top + 2/3 bottom. - Skirts and dresses: A-line, bias, and fit‑and‑flare build hip shape without bulk.
- Pants that complement: Try wide-leg, bootcut, or straight to balance the top; mid/high rise highlights the waist.
- Layer with intent: A short, shaped jacket over a fluid top adds curves and stacks thirds.
- Fabric & fit: Favor soft, stretchy knits that skim; pick regular fit to show shape, or relaxed with a belt for ease.
- Avoid the “tube” effect: Skip boxy-on-boxy (straight jacket + straight pant) without a waist cue or vertical break.
Step 7. Dress the round (apple) shape: streamline the torso and highlight legs
Round (apple) shapes carry fullness through the midsection with a broader upper body and great legs. Your aim: smooth the torso, visually place the waist higher, and keep the eye moving vertically. Think open necklines, clean layers, strategic hemlines, and bottoms that create length without clinging at the tummy.
- Open the neckline: V and scoop necks elongate; skip high crews/turtlenecks or layer them under an open jacket.
- Structure without squeeze: Single-breasted blazers and tailored cardigans worn open create a long, vertical line.
- Monochrome magic: Go column color or darker on top, lighter below to shift attention to the legs.
- Choose easy bottoms: Straight-leg or slim-straight, mid/high-rise that sit near the navel to lengthen and smooth.
- Skirt and dress shapes: Knee-length A-line, wrap/empire, or pencil with a relaxed top; add slits for movement.
- Place the “waist”: Use a front tuck, soft belt, or wrap to hit your natural waist and restore thirds.
- Smart sleeves: 3/4 sleeves showcase the wrist; keep shoulders streamlined and skip heavy embellishment.
- Fabric that skims: Favor smooth, draped knits with stretch; avoid bulky or clingy midsections. Double-front styles create a sleek silhouette.
- Leg-lengthening shoes: Low‑vamp pumps or pointed flats (nude to your skin tone) and opaque tights extend the line.
Step 8. Dress the pear (triangle) shape: balance the hips with interest up top
Pear shapes carry more width through hips and thighs with a narrower shoulder/bust. Your mission is simple: draw the eye upward, broaden the shoulder line subtly, and keep the lower half smooth and streamlined. Use color, neckline width, and structure to balance, then let hemlines and fit create length.
-
Add interest up top: Choose boat or sweetheart necklines, plus scoop and refined Sabrina cuts to visually widen shoulders. Use prints/brighter colors on top and layer lightly (cardigans, scarves). Statement earrings/necklaces focus attention upward.
-
Streamline the bottom: Go darker on the lower half and avoid clingy, overly tight pieces. Opt for A-line skirts, wide‑leg or straight trousers, and fit‑and‑flare dresses that skim without grabbing.
-
Pick smart top lengths: Aim for tops that hit at the widest part of your hips and avoid extremes (very long or very cropped) to keep proportions intentional.
-
Use structure thoughtfully: A shaped jacket with subtle shoulder detail balances hips; keep embellishment below the waist minimal.
-
Fit that flatters: A regular fit with room at the hips prevents ride‑up; double‑front tops create a smooth, confident silhouette.
-
Lengthen the leg: Choose low‑vamp or pointed shoes (nude-to-you works wonders) to extend your vertical line.
Step 9. Dress the inverted triangle shape: add volume below, simplify up top
Inverted triangles have broader shoulders or bust than hips. Your goal is to soften the shoulder line, keep the upper body simple, and build subtle volume from the waist down. Use color and proportion to your advantage: keep tops darker and streamlined, shift brightness and print to the lower half, and aim for 1/3 top + 2/3 bottom so the eye reads more length and balance below.
-
Streamline the top: Choose V or scoop necks to create a vertical line; keep collars minimal. Go darker/solid up top and avoid boat/Bardot or halter necklines that broaden the shoulders.
-
Soften shoulders with sleeves: Pick raglan or dolman sleeves; skip cap sleeves, puff shoulders, heavy pads, or epaulettes.
-
Add volume below: Opt for wide‑leg or straight trousers, A‑line and pleated skirts, and tiered hemlines. Lighter colors or prints on the bottom help balance width.
-
Jeans that work: Try boyfriend or wide‑leg/straight styles; mid/high rise supports that
2/3 bottomlook. -
Dress shapes: Go fit‑and‑flare, A‑line, or wrap with a swishy skirt to add movement and width below the waist.
-
Jackets with ease: Wear single‑breasted, soft‑shoulder styles; peplum or slight flare at the hem adds hip presence. Avoid strong shoulder builds.
-
Finish the line: Use long necklaces to draw the eye down and lighter/brighter shoes to anchor the lower half; keep the top free of heavy embellishment.
Step 10. Dress the hourglass shape: accentuate the waist without extra bulk
Hourglass figures are naturally balanced—hips and shoulders align with a defined waist. Your strategy is to follow that silhouette: keep lines clean, highlight the middle, and avoid extras that add bulk at the bust or hips. Think body‑skimming, not tight; shaped, not boxy.
- Define the waist: Use belts, wrap tops/dresses, tie-fronts, peplums, and princess seams to emphasize your middle.
- Pick smart necklines: V, scoop, and Sabrina show shape without heaviness. To minimize a fuller bust, choose boat or scoop and avoid bulky turtlenecks.
- Choose fitted layers: Single‑breasted, waist‑nipped blazers and cropped jackets that hit at or just above the hip keep proportions sleek; skip boxy or heavily embellished shoulders.
- Skirts & dresses: Pencil, bias, and fit‑and‑flare silhouettes celebrate curves; wrap and empire styles are especially flattering. Knee length or longer keeps the line elegant.
- Pants & jeans: Mid/high rise elongates and supports; try straight, bootcut, or wide‑leg for balance. Prefer angled or pocketless pockets to avoid hip pull; skip low rise.
- Fabric & fit: Favor lightweight, stretchy knits that skim. Avoid chunky knits or stiff, boxy cuts that hide your waist. Regular fit usually flatters; add a belt if wearing relaxed styles.
- Simple formula: Fitted top + high‑rise straight leg + belt—or a wrap dress + streamlined blazer—for instant polish.
Step 11. Fabric, structure, stretch, and underpinnings that flatter your silhouette
Fabric and construction do the quiet heavy lifting in how to dress for your body shape. The right knit skims instead of clings, smart seams place the “waist,” and supportive underpinnings keep lines smooth so proportions read clean. Prioritize breathable, wrinkle‑resistant pieces with gentle stretch—you’ll move comfortably, pack easily, and look polished from morning to night.
- Choose smooth knits with recovery: Ultra‑soft microfiber-spandex blends with stretch skim the body and resist cling.
- Add structure where you need it: Single‑breasted blazers, princess seams, darts, and contoured waistbands define shape.
- Skip unnecessary bulk: Chunky knits, stiff fabrics, and heavy pockets add volume at your widest points.
- Leverage layers smartly: Double‑front tops create a sleek silhouette; single‑layer styles keep things light and fluid.
- Use stretch strategically: Mid/high‑rise bottoms with stretch, bias cuts, and subtle ruching shape without squeeze.
- Secure your foundation: A well‑fitting bra, seamless panties, a smoothing slip or shorts, and optional light shapewear keep everything sleek—no lines, no riding up.
Step 12. Color, print, and vertical details that elongate and slim
Color and print are powerful tools for proportion. Dark tones recede; light tones and shine advance. A “column” of one color (or close tones) makes you look taller and leaner, while vertical details guide the eye up and down. Print scale and placement matter, too—smaller or medium prints and vertical motifs tend to read sleeker than bold, all-over patterns.
Use color to balance your shape. Place darker shades where you want less focus and lighter/brighter shades where you want emphasis. Pears often go brighter up top and darker below; inverted triangles do the reverse. Apples benefit from monochrome columns with an open layer; rectangles create a waist with color-blocking; hourglasses keep contrast near the waist without adding bulk.
- Create a column: Wear one color head-to-toe; match tights and shoes.
- Go tonal: Similar hues from top to toe lengthen without feeling flat.
- Direct attention: Darker where you minimize, lighter/print where you highlight.
- Think vertical: Pinstripes, center plackets, long necklaces, open cardigans, front slits.
- Mind print scale: Small–medium or placement prints flatter; huge prints add volume.
- Control contrast: Low-contrast belts and hems keep thirds clean; avoid harsh horizontal breaks at your widest point.
Step 13. Build a shape-friendly capsule wardrobe with tops, tunics, and dresses
A smart capsule keeps silhouettes simple, plays to the rule of thirds, and relies on breathable, wrinkle-resistant knits with gentle stretch that skim—not cling. Aim for a mix of necklines, lengths, and fits (regular, relaxed, loose), plus a few waist-defining options. Choose a core neutral for column outfits, then add two accent colors for versatility.
-
V-neck regular-fit top (hip-length): Universal elongator; great base for
1/3 + 2/3. - Scoop-neck relaxed tee (double-front): Smooths and draws the eye up; ideal for pears and rectangles.
- Boat-neck top (regular fit): Subtly broadens shoulders for pears; inverted triangles can skip.
- Sabrina-neck polished top: Refined, work-friendly openness without a deep plunge.
- Fine-gauge turtleneck (layering): Best under open layers; restores a vertical line on apples.
-
Side-slit tunic (mid-thigh): Creates
2/3 on top; pair with slim/straight bottoms. - Wrap dress (knee-length): Defines the waist on rectangles and hourglasses; flatters apples with a soft tie.
- Fit-and-flare dress (knee/midi): Balances hips for pears; celebrates hourglass curves.
- Column midi dress with slit: Tonal elongation; add a belt when you want definition.
- Single-breasted, waist-nipped layer (blazer/cardigan): Worn open for a long vertical line.
Build around what flatters your shape most: pears prioritize boat/scoop tops and fit-and-flare dresses; apples lean into V-necks, tunics, and wrap styles; rectangles add belts and peplums; inverted triangles choose V-necks with A-line skirts; hourglasses keep pieces shaped and uncluttered.
Step 14. Quick outfit formulas by body shape for work, casual, travel, and events
Use these fast formulas to turn guidelines into outfits you can grab and go. Keep proportions in thirds, favor smooth knits that skim, and place color where you want attention. Swap shoes and layers to move from desk to dinner without losing your shape.
| Body shape | Work | Casual | Travel | Events |
|---|---|---|---|---|
| Rectangle | Shaped blazer, belted V-neck + straight trousers | Half-tucked scoop tee + high-rise wide-leg | Side-slit tunic + slim pants + flats | Wrap or fit‑and‑flare dress; waist belt |
| Round (Apple) | Open blazer + V-neck double-front + straight | Relaxed scoop + slim-straight, 3/4 sleeves | Monochrome tunic + leggings; long cardigan open | Empire or wrap knee dress; pendant, tights |
| Pear (Triangle) | Boat neck, tucked; A-line or wide-leg | Printed scoop top + dark straight jeans | Mid-thigh tunic + slim pants; scarf | Fit‑and‑flare dress; brighter top details |
| Inverted Triangle | V-neck top; A-line or wide-leg; soft blazer | Relaxed V + boyfriend/straight; lighter shoes | Dark top, printed pants; open cardigan | Wrap or A-line dress; fuller skirt |
| Hourglass | Waist‑nipped blazer; scoop/V + straight/bootcut | Regular-fit tee; high-rise jeans + belt | Knit wrap dress; open cardigan; flats | Pencil or fit‑and‑flare; defined waist |
Prefer breathable, wrinkle-resistant knits with gentle stretch and UPF 50+ for comfort, polish, and easy packing; add a low‑vamp shoe to keep every formula long and lean.
Step 15. A try-on checklist and simple tailoring tips for a polished look
Great style happens in the fitting room and the mirror at home. Use this quick checklist to confirm proportion, comfort, and finish; then rely on simple, affordable tailoring tweaks to perfect pieces you love. Aim for skimming fits, clean thirds, and smooth lines that don’t cling or collapse.
Try-on checklist
A 30-second scan to ensure balance and ease.
-
Proportion check: Do you see
1/3 + 2/3somewhere? Adjust tuck, belt, or hem if not. - Sit-and-raise test: Sit, reach, and walk—no pulling at bust, waist, hips, or seat.
- Side view: Smooth through the midsection; no pooling at lower back or front crotch.
- Neckline balance: Face soft and open (V/scoop) or structured (boat/Sabrina) as intended.
- Hem placement: Lands at slimmer points (high-hip, knee, ankle) rather than widest.
- Sleeve reveal: 3/4 or cuff shows wrist; shoulders lie flat without dents or peaks.
- Fabric recovery: Light stretch snaps back; no shine or sheerness over curves.
- Foundation smoothness: Bra lines invisible; double-front/smoothing layer if needed.
- Shoe sync: Low-vamp/pointed shoes lengthen; bulky straps shorten.
Simple tailoring tips
Small edits with big payoff.
- Hem to thirds: Knee for dresses/skirts; ankle or top-of-foot for pants.
- Nip the waist: Add darts or take in side seams for gentle shaping.
- Shorten sleeves: To wrist bone or 3/4 to spotlight a narrow point.
- Move buttons: Shift 1/4–1/2 inch to prevent gape at the bust or waistband.
- Taper/let out: Subtle leg taper or seam release to stop cling or pull.
- Press and steam: Define pleats and seams; keep knits sleek and wrinkle-free.
Step 16. Mindset matters: body-positive styling and flexible “rules”
Your body isn’t a problem to fix—clothes are tools to support it. Treat everything here as guidance, not law. Bodies shift with time; distribution changes, confidence grows, and your style should evolve with you. When you use proportion and fit as flexible tools, how to dress for your body shape becomes about amplifying what you love, not hiding what you don’t.
- Comfort first: If it pinches, rides up, or restricts, it won’t look polished.
- Lead with one focal point: Neckline, waist, or hem—choose one and keep the rest simple.
- Bend the “rules”: Love a boat neck with broad shoulders? Balance it with wide legs and column color.
- Use photos as feedback: A quick snap reveals proportion wins better than memory.
- Evolve on purpose: Revisit fit and hemlines seasonally; tailor or retire what no longer serves.
Celebrate wins, learn from misses, and let your taste—not fear—have the final say.
Conclusion
You now have a clear, body-positive roadmap: quick measurements to identify your shape, the rule of thirds to master proportion, necklines that flatter, sleeves and hemlines that balance, and fit strategies that smooth and define. Layer in fabric, color, and a few reliable outfit formulas, and getting dressed shifts from guesswork to effortless polish. Keep the “rules” flexible, let comfort lead, and use photos and tiny tweaks to refine.
Ready to put it into practice? Start with pieces that do the work for you—soft, breathable knits with stretch, wrinkle resistance, UPF 50+, and smart construction like double-front smoothing in necklines you love (V, scoop, boat, Sabrina, or turtleneck) across regular, relaxed, and loose fits. Build a small capsule of tops, tunics, and dresses you can mix for thirds-friendly outfits, then add a belt or blazer for definition. Explore shape-flattering staples at JudyP Apparel and step into easy, confident style today.
Shop Premium Styling Staples
Deborah 3/4 Sleeve V-Neck Top
$94.00
Stephanie Scoop Neck Tank Top
$84.00
Sabrina Boatneck 3/4 Sleeve Top
$94.00
Peg Scoop Neck Ruched Hem Tank Top
$59.00